Every once in a while I do something stupid with my system that it can sometimes take me weeks, months or in some cases even years to discover and fix. Very often these stupid things involve changing a setting on my turntable in a moment of frustration and poor judgement, usually when I’m trying in vain to get a bad record to sound good.
For years, even decades, I was afraid to touch any of the settings on my turntable, only to discover that when I finally did, I wished I’d done it a lot sooner. Turntable setup has taught me a lot, and as I’ve gotten better at it and better informed about it, I now need to go back and revise the turntable setup guides I posted a few years ago, which are in need of revision and updating.
One thing I’ve discovered since writing my setup guides is that, even a turntable that’s set up wrong, or at least not completely right, can still sound fantastic with certain records. This means that if you or whoever sets up your table, fails to dial in the tracking weight, arm height, azimuth (if your tonearm has that setting) and anti-skate just right, not only will you not necessarily know it, you might think it’s set just fine.
And with a brand spanking new cartridge installed and breaking in, on record after glorious record, your system sounding better and better with each passing day, you may very well think your table setup is darn near perfect! But eventually, one day in Mudville, you’ll play a record that does NOT sound right, maybe even downright bad.
I need to keep reminding myself of this, over and over again: most often when I hear bad sound from my system, the problem is with the record and not with my system. This is the very reason I keep encouraging everyone who visits this site to buy a few Hot Stampers for reference. You need records vetted for great sound by someone who you can be sure has their turntable set up well, and their system tweaked to the hilt. If you’re playing a Hot Stamper and you hear bad sound, then you can pretty much know for sure that the problem is with your turntable setup, or some other element of your system, and then you can get to work on fixing it. But if you play a crappy record and you start trying to fix that? Well, you’re likely to make every other record you have sound worse.
A day or two ago I put on a record that I hadn’t played in quite a while, my Super Hot Stamper of Humble Pie’s Rock On. For a long time this was a record I would play whenever I wanted to remind myself that my system was doing a lot right. I considered it a very easy record to play back, as they go, and therefore an easy one to just sit back and enjoy. On this particular occasion though, I was not enjoying it. Not at all!
But what the heck was the problem? That great copy of Kind of Blue had just been sounding fantastic! So had my newly acquired reissue of Everybody Digs Bill Evans. That record had completely knocked my socks off just a day earlier! Had I somehow misjudged the Humble Pie record? Had the staff of Better Records got this one wrong? I started fiddling with the VTA and the record started to sound better, but still not great. The sound was still too “flat,” and dare I say, um, bright? I shuddered to think of it. What was going on?
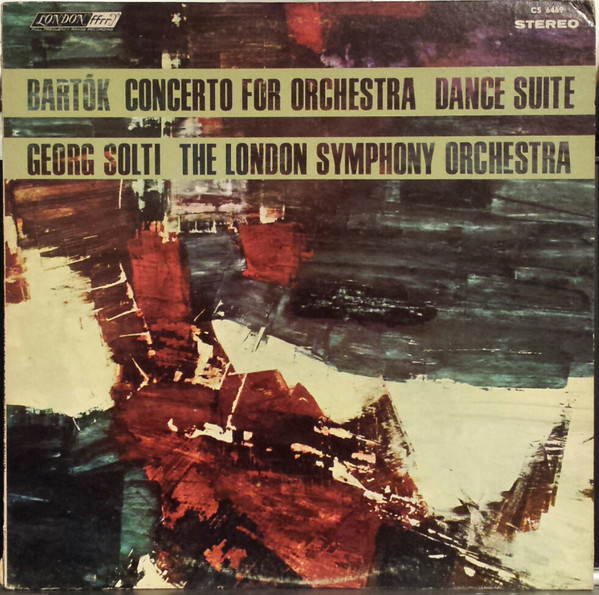
The following day, with a clearer head and several hours free to dive in deep, I started playing some other rock albums and realized I was hearing a similar problem. Then I remembered that several weeks ago, as I was trying to get a classical record to sound right, I changed the amount of anti-skate a little on my Triplanar tonearm. It was an adjustment that, at the time, seemed to work. The record I was playing, I think it was a Bartok record, did seem to sound better to me after I did it. As did several other records I played in the days that followed.
But since that time, I had discovered yet another, bigger “problem.” I had inadvertently pushed a button on the back of my E.A.R. 324 that changes the output level for the phono stage from MC to MM. I’m using the Dynavector Karat 17dx, a MC, but I had it set for MM, and I’d had it that way for months!
I discovered this only about a week earlier, after I’d lowered the anti-skate. Only now the sound of my system had changed, and I was hearing more of what the E.A.R. 324 was doing and less of what my amp was doing, not to mention hearing it with a lot less noise and therefore more detail and clarity. Now I needed to reconsider any significant adjustments I’d made during this time, the most significant of which being the change to the anti-skate.
I decreased the amount of anti-skate. It was maybe two tenths of a gram, maybe a tad more or less, but it was enough to make what I would call a DRAMATIC difference. I put the Humble Pie record back on and the problem was fixed. It now sounded like the record I remembered. The ROCK and ROLL POWER was BACK! Rock on indeed!
For years now I’ve been meaning to write up a guide for setting anti-skate by ear. In my experience, this is one area of turntable and tonearm adjustment that is woefully lacking in most of the online resources. As I recall, my takeaways after noodling around on the web looking for help on this setting were that anti-skate matters and most people use too much, but how much to use and how to determine that by listening remained unclear to me.
This new experience has served to clarify for me how to set the anti-skate and what to listen for to do it. Here’s what I’ve learned.
Setting Anti-skate by ear
What does anti-skate do? It counters a force inherent in the way a turntable works that is pulling the stylus toward the center of the platter. This force is called skating force. The goal in setting the anti-skate is to get enough of a counter force to this skating force so as to keep the stylus in the center of the record groove while it tracks across the record.
Skating force is not the same throughout playback. It decreases as the stylus approaches the spindle, much like the pull of a rope on a waterskier decreases as the skier gets closer to the boat’s wake. Therefore setting anti-skate is always to some extent an approximation, as the ideal amount of counterforce is different depending where on the record the stylus is sitting.
For this reason, it’s not unheard of for audiophiles to completely dismiss anti-skate. The justification being that since it can never be perfect anyway, then why bother in the first place? Not only is this flawed thinking, it’s just flat out wrong. We need anti-skate if we don’t want to wreck our records. Ever heard an old record with groove damage? It ain’t pretty. Pull out your vintage copy of The Doors and play “The End”, you’ll probably hear some.
Another common and completely wrong approach to setting anti-skate is to set it as the same force as the downforce for the cartridge. In other words, however many grams you set your tracking force at, set the anti-skate at the same amount. I’ll admit the limits of my understanding of physics here (I barley passed physics at Berkeley my freshman year and quickly pivoted from engineering to psychology) and say that while this approach may or may not have validity from a scientific standpoint, and while it certainly is an elegantly easy way of setting anti-skate, it simply doesn’t work. If you set it this way it will be way too high and you’ll wear out your records and prematurely wear out your stylus.
So what to do? Well, you can begin by setting the anti-skate to the much more sane number I was able to find in this article on the subject. Start with .1 to .12 of your downforce ( VTF or tracking weight) and then you can do the fun part of dialing it in by ear. Play record after record after record and listen for certain patterns in the sound, hearing how small changes in the amount of anti-skate affects those patterns.
If you’re anything like me, you’ll be reluctant to do what really, ultimately, needs to be done, and start changing the setting at random to observe how it affects the music. Personally, as much I’ve realized that, in audio as in life, sometimes you just have to try stuff and see what happens, I can also find the absence of a clear direction to move in a hinderance to getting started. So to help you get started, here are some tips.
The right amount of anti-skate gives music its rhythmic energy.
The rhythmic energy of music relies on having sufficient friction on both sides of the record groove. If your anti-skate is even a little too high or low, the music will lack this rhythmic energy, and it will sound lifeless and flat. Rock music will refuse to rock the way it should, jazz music will not come to life like it can, and classical orchestral music will want for articulation and impact.
When I first played my Humble Pie Hot Stamper, one thing I noticed right away was that it just didn’t rock the way I’d remembered. The drums didn’t hit and pop with force, the bass was not tight and deep, and most importantly, the music didn’t scream “turn it up!”. I also noticed that the vocals, particularly the backing vocals, had a harsh brightness that instead yelled, “turn it down!”.
On the opening track, “Shine On,” when the backing vocals came up, echoing Frampton, they rose to a glare. And on the next track, “Sour Grain”, Steve Marriott’s voice became an unbearable shriek. I love this album, but I didn’t love it the way it was sounding. Something had to be done!
Fortunately, I knew it could sound better, and by the next day I remembered my little anti-skate adjustment a from few weeks earlier, and I adjusted it again. Much to my delight, the rock energy was restored, and the vocals went from bright and edgy to sweet and soaring. That brightness I was hearing? I realized it was not just rhythmic energy I’d been missing, but also top end resolution.
When anti-skate isn’t set right, the music will lack clarity and focus.
When there’s too little, or too much anti-skate, the stylus doesn’t track the inner and outer grooves evenly, and therefore the right and left channels are not equally represented in the signal. It’s like looking at an object with one eye partly closed. We can’t see the object clearly, and we can’t find it clearly in space.
In music, this manifests as a lack of resolution and clarity. We can’t “see” the performers, let alone see into the performance. Instead of hearing a voice or an instrument placed convincingly in space, the edges are blurred, and the placement is vague and unconvincing.
When anti-skate is not set right, you can get significant bass distortion.
At the top of the frequency range, poor channel balance limits top end extension, and this results in brightness or glare. Meanwhile at the bottom end, the result is flabbiness and distortion. I had been hearing bass notes distort on certain records, and I’d been chalking it up to my puny 30 w.p.c. amp running out of power to drive my six 10 inch woofers. After increasing the amount of anti-skate, just a little bit mind you, I went back to some of the records on which I’d been hearing the bass distort, and found that the distortion either went away entirely, or that I needed substantially more volume to make it happen.
Finally, I pulled out a copy of the aforementioned Doors record that I’d noticed had significant groove wear, rendering it unlistenable to my ears a day earlier. And while the adjustment I’d made to the anti-skate couldn’t undo the groove wear, it made it less noticeable and the record much more listenable, not to mention a heck of a lot better sounding.
As I mentioned earlier, the song “The End” is a good test for groove wear on this title, and it’s also a track that shows how well this album is recorded. The tambourine that plays in front of the drums to the left of the soundstage early in the song has a convincing, weighty presence on the better copies, and the drums, sitting WAY back in the soundstage, sound BIG and POWERFUL.
Properly set anti-skate improves vocal presence
Jim Morrison’s voice, also sitting a ways back, presents as bold and clear and powerfully alive. But in this case, even with the groove noise interfering, I could still hear that he didn’t sound right. I lowered the anti-skate slightly, and sure enough, Jim snapped right into place, and I could hear not just the clarity in his voice, but the sound of the studio space around him.
The beauty of analog audio – what WE do matters!
This experience was an important lesson for me, and a lesson that any analog audiophile needs to learn, and keep learning. Because of the complex mechanical nature of our source, not to mention the many variables with the source material we play on it, what we do with our turntable set up has an absolutely MAMMOTH impact on how our records sound. Little adjustments make a very big difference, and as we become better listeners, and as our systems become more revealing and precise, the degree to which small things matter only increases.
Therein lies the beauty of analog audio. It’s not plug and play. We, the listener, play an active role in the reproduction of the music. Therefore I might argue that if we’re willing to step up to the task of finding, cleaning and playing the best sounding records we can, and then learning to play those records back with the highest and truest fidelity possible, we ourselves as audiophiles play a small but essential part in what makes that music special.
And while we may be just playing a small part, it’s one that, in my view, elevates the audiophile hobby above just playing records on silly expensive equipment. With the right approach, we can help bring our favorite music to life in the way the artists who made it intended.
Properly set anti-skate brings classical orchestral music to life!
Yesterday afternoon I put on the Bartok record that, if I remember correctly, was the original catalyst for my poorly set anti-skate. I don’t recall what I was hearing at the time that made me decide to change it, but I could hear very clearly what was happening now. The music SOARED into a HUGE, OPEN SOUNDSTAGE. I realized right away that I couldn’t remember it ever sounding that big, that open and that wondrously spacious.
Meanwhile, the strings had a warm, sumptuous shimmer to them, breathing life into the hall as the brass blasted away with thrilling clarity from seemingly impossible places in the soundstage. The tympani, big, powerful and clearly placed at the back, brought a captivating bombast and boldness to the piece. I could go on and on. This record was sounding better than ever. What had I been thinking before?
And while the record did sound wonderful, I knew it wasn’t entirely perfect. Not surprising seeing as how perfect is the bar I keep reaching for but never quite get ahold of. After all, no record and no system playing it is perfect. There are always compromises to be made.
Properly set anti-skate makes it easier to set your VTA
Nevertheless, after improving my setting for anti-skate, I was able to achieve even better sound with a small change in the arm height / VTA. I can’t say exactly how much, but it was tiny. And that change cleaned up the sound just enough for me to feel that I’d gotten the most out of this copy of this record on this system as I might ever get. Certainly more than I’d ever gotten before.
And it makes sense right? If your anti-skate is set right, then everything on the record is clearer, more open, more present and more lifelike. If then the arm is a little too high, or a little too low, you hear that difference more. You hear what sounds “right” and what doesn’t, and you can dial it in with greater ease and accuracy.
Some day I hope to cobble together the perfect words to convey what I hear when I’m playing a truly great sounding record and my turntable is set just right. It’s after I’ve used my Talisman on all my wires and speaker drivers, the electricity is behaving itself and my ear and brain are sitting comfortably, right smack dab in the zone for listening. When those moments come, the artifices that are more often the rule than the exception with recorded music, disappear, and I’m hearing recorded music in its truest most uncolored form.
This experience took a long time to achieve. I literally had to change every component in my system and move that system into a different room to get there. At the start of this process, I had a handful of “aha” moments coming here and there. Then as I pressed on, with each improvement, these moments arrived more frequently. Recently I’ve reached the point where these moments can come at just about any time with just about any record I play. As a friend of mine put it, just as we wrapped up a listening session the other day, “your system can play anything!”
In analog, small things matter.
A key takeaway from this experience has been this – in analog, small things matter, and as your system and your ear improve, and you get better and better records to play on it, what used to be small things will have become big things that matter more than ever.
So if you’re struggling at the moment to discern how much anti-skate to use, or where to set your arm height, or your tracking weight, stay the course. I struggled too. Then when I honestly least expected it, a great record showed me the way forward. I hope that with a few of my suggestions above, and with a few great records of your own, you’ll find your way forward too. Because I can guarantee you, it’s worth the effort!